A beautifully designed home deserves lighting that works with it, not against it. Yet many homeowners find themselves living with a patchwork of switches, mismatched fittings, and controls that bear no relation to how the spaces were conceived. The result is a home that looks right on paper but feels disconnected in daily life. Integrated lighting changes that. When your lighting is planned, layered, and controlled as a single coherent system, every room responds to how you actually live. This guide walks you through the complete process, from assessing what you have to fine-tuning a finished installation, so you can approach the project with clarity and confidence.
Table of Contents
- Assess what you have and what you want
- Plan your lighting integration: design, controls, and compatibility
- Step by step installation and integration process
- Testing, fine-tuning, and troubleshooting
- Why integrated lighting isn’t just a luxury: what most guides miss
- Bring your home’s lighting integration to life with expert support
- Frequently asked questions
Key Takeaways
| Point | Details |
|---|---|
| Prioritise hardwired controls | Hardwired smart lighting systems are more reliable and future-proof for architect homes. |
| Plan lighting integration early | Involving lighting experts during design ensures seamless, harmonious results and avoids mistakes. |
| Smart controls yield major savings | Automated sensors and zoning can cut energy use by up to 90%. |
| Design for daily life | Tailoring lighting zones and scenes around daily routines enhances comfort and beauty. |
| Professional installation matters | Expert setup is crucial for sophisticated systems to deliver on both performance and aesthetics. |
Assess what you have and what you want
Before any new fitting is selected or any cable is routed, it pays to take stock. Understanding your current setup and your aspirations gives any lighting designer or installer a far stronger foundation to work from, and it saves you from costly changes later.
Start by walking through each room and noting the following:
- Existing fittings: What type are they? Recessed downlights, pendants, wall lights, floor lamps?
- Wiring and switching: Are circuits already separated by zone, or is everything on one switch?
- Control types: Standard switches, dimmers, or any existing smart controls?
- Natural light patterns: Where does daylight enter, and at what times does it shift?
- Architectural features: Cornicing, joinery, artwork, textured surfaces, or double-height volumes that deserve considered illumination
Once you have this picture, think about how each space is used. A kitchen that doubles as an entertaining space needs different scenes to one used purely for cooking. A study benefits from task-focused light that doesn’t spill into adjacent areas. A bedroom calls for warmth and gentle dimming in the evening.
Colour temperature matters here. Expert lighting tips consistently point to 2700K as the ideal warm tone for living spaces, paired with a high CRI (colour rendering index) so materials and finishes appear as they were intended. Avoid defaulting to a grid of downlights, which tends to flatten a space rather than shape it.
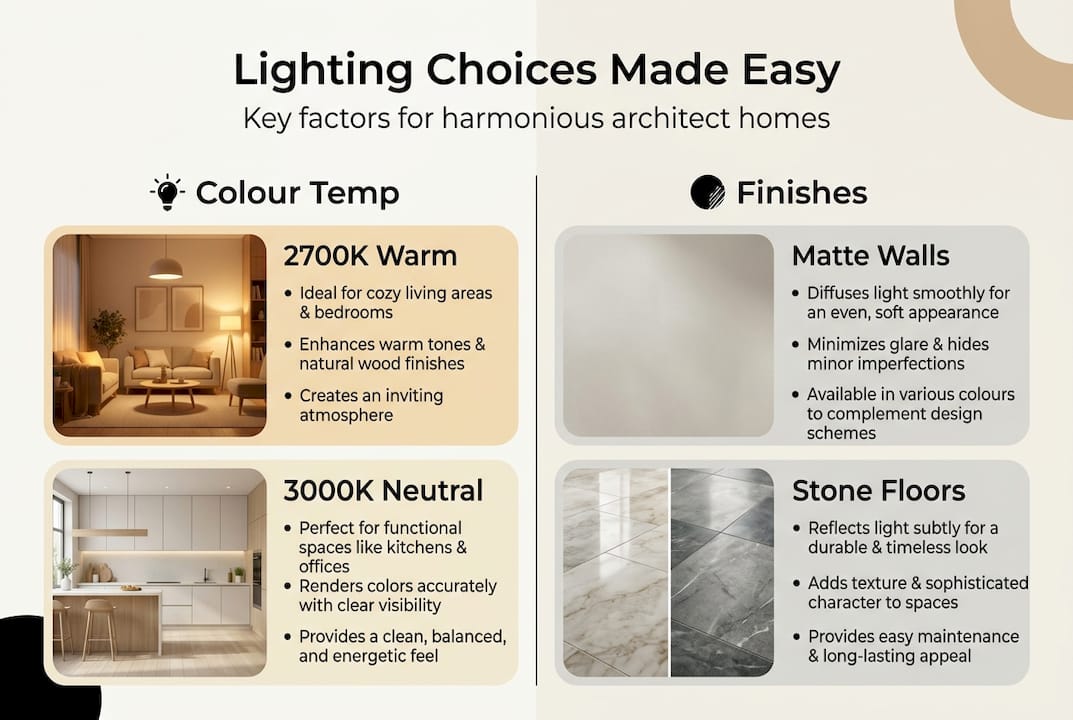
For harmonious home lighting design, gather information on your finishes early: the reflectivity of stone floors, the depth of timber joinery, the tone of wall coverings. These details inform which fittings and colour temperatures will complement rather than compete.
Pro Tip: Create a simple room-by-room table noting current fittings, desired mood, and key architectural features. This becomes an invaluable reference throughout the project.
| Room | Current setup | Desired mood | Key feature |
|---|---|---|---|
| Kitchen/dining | Single circuit, halogen | Warm task + ambient | Island and joinery |
| Living room | Two circuits, no dimming | Layered, soft evening | Fireplace surround |
| Master bedroom | One switch, no dimming | Gentle, warm, dimmable | Ceiling detail |
| Study | Pendant only | Focused task light | Desk and shelving |
Plan your Lighting integration: design, controls, and compatibility
With a clear understanding of your goals and current setup, it’s time to design a system that truly fits your home and lifestyle.
The choice of control platform shapes everything that follows. Each system has distinct strengths:
- Lutron is widely regarded as the benchmark for dimming performance and reliability. It integrates seamlessly with most AV and home automation platforms and is particularly well suited to larger properties.
- Control4 offers whole-home automation, bringing lighting, audio, climate, and security into one interface. It suits homes where multiple systems need to work together.
- DALI-2 (Digital Addressable Lighting Interface) is a professional-grade protocol used in architecturally complex projects. Each fitting is individually addressable, giving precise scene control.
- Rako is a strong choice for retrofit projects, offering wireless and wired options that work well in existing buildings where running new cable is disruptive.
Smart lighting installation guidance is clear that hardwired systems are preferred in new builds for long-term reliability, with wireless options better suited to retrofits where cabling is impractical.
Scene and zone planning is where the system becomes personal. Think in terms of moments: morning routines, evening entertaining, quiet reading, late-night movement. Each scenario benefits from a pre-set scene that activates with a single press or a voice command.
For guidance on structuring your lighting workflow integration, consider how scenes will transition through the day. Sensors that respond to occupancy and daylight levels add another layer of intelligence, reducing energy use without requiring manual adjustment.
Review the lighting systems for your home that align with your build type and budget before committing to a platform. Involving a lighting professional early in the design process avoids the common mistake of selecting fittings before the control strategy is confirmed.
| System | Best suited to | Wired/wireless | Complexity |
|---|---|---|---|
| Lutron | New builds, large homes | Both | Moderate |
| Control4 | Multi-system lighting integration | Both | High |
| DALI-2 | Architectural projects | Wired | High |
| Rako | Retrofits | Both | Low to moderate |
Step by step installation and Lighting integration process
With your system design in hand, the next stage tackles the transformation on site, step by step.
- First fix wiring: All lighting circuits, control cabling, and data runs are installed before walls are closed. This is the most critical phase. Errors here are expensive to correct later.
- Control panel and processor placement: The central processor or dimmer rack is positioned in a comms cabinet, typically in a utility room or plant space. Accessibility for future servicing matters.
- Fitting installation: Fittings are installed at second fix, once decorating is complete. Each is connected to its designated circuit and confirmed against the zone plan.
- Smart control and sensor integration: Keypads, occupancy sensors, and daylight sensors are wired and configured. Each is assigned to its relevant zone and scene.
- System commissioning: The installer programs all scenes, sets dimming curves, and calibrates sensors. This is where the system comes to life as a coherent whole.
- User interface setup: Keypads, touchscreens, and app interfaces are configured. You should be able to operate every scene intuitively from day one.
- Handover and training: A thorough walkthrough ensures you understand how to adjust scenes, add new ones, and contact support if needed.
Professional installation is strongly recommended for hardwired systems. Reliability over years of daily use depends on correct wiring, proper commissioning, and compliance with Part P of the Building Regulations.
Avoid systems that rely solely on an app for control. If your network drops or a device updates unexpectedly, you should always be able to operate your lighting from a physical keypad.
For a deeper look at how lighting control for daily living shapes the experience of a home, the relationship between physical controls and digital interfaces is worth understanding before you finalise your design.

Pro Tip: Ask your installer to label every circuit clearly in the comms cabinet and provide a written zone map. This makes future changes or fault-finding straightforward for any engineer.
LIGHTING INTEGRATION: Testing, fine-tuning, and troubleshooting
After the last cable is secured and the controls are set, it’s time to see your vision come alive and ensure flawless operation.
Begin with a structured test of every zone and scene:
- Activate each scene in turn and confirm the correct fittings respond
- Check dimming curves: do lights fade smoothly, or do they flicker at low levels?
- Walk each sensor zone to confirm occupancy detection triggers correctly
- Test daylight sensor response by observing behaviour at different times of day
- Confirm app and keypad controls are synchronised, so a change on one is reflected on the other
- Check for glare, dark spots, or uneven distribution in key areas
Fine-tuning is a natural part of the process. Scenes that look right during commissioning may need adjustment once you’re living with them. A dining scene might need the pendants slightly warmer, or a hallway sensor might need its sensitivity reduced to avoid false triggers.
Common issues and their solutions:
- Dimmer flicker: Usually caused by incompatibility between the dimmer and LED driver. Confirm compatibility before purchasing fittings.
- Sensor false triggers: Adjust sensitivity settings or reposition the sensor away from heat sources.
- App and switch out of sync: Typically a network configuration issue. Your installer should resolve this during commissioning.
- Uneven scene response: Check that all fittings on a circuit are the same type and driver specification.
The energy savings from a well-integrated system are measurable. Smart lighting controls that use zoning and sensors can reduce energy use significantly, with some estimates pointing to savings of 10 to 20 per cent on heating-related energy through better lighting integration across systems. When you combine occupancy sensing, daylight harvesting, and scene-based dimming, the reduction in unnecessary energy use becomes a genuine long-term benefit.
For further reading on energy-saving lighting design, the principles of zoning and sensor-led control apply directly to the fine-tuning process described here.
Why integrated lighting isn’t just a luxury: what most guides miss
Most articles on lighting integration focus on the visual result, the beautiful scenes, the seamless control. What they rarely address is the longer-term value of getting the architecture and the lighting aligned from the outset.
We see it regularly. Homeowners who retrofitted lighting controls after completion often wish they had planned the system earlier. Not because the result looks wrong, but because the constraints of working around finished walls and existing circuits meant compromises that a planned approach would have avoided.
Integrated lighting also supports how a home evolves. A system designed with flexibility in mind can accommodate a growing family, a change in how spaces are used, or new technology that emerges over time. Layered lighting for comfort is about more than aesthetics. It supports circadian rhythms, reduces eye strain, and makes a home feel genuinely restful.
The homes that get this right share one thing in common: the lighting was considered at the same time as the architecture, not added afterwards. That alignment is where the real value lies, and it’s the detail that separates a considered home from one that merely looks the part.
Bring your home’s lighting integration to life with expert support
If you’re ready to move from planning to action, we work with homeowners and their design teams to create lighting systems that are as considered as the homes they serve.

From initial consultation through to commissioning and aftercare, our approach is design-led and built around your home’s specific architecture and how you live in it. Explore our lighting automation home experience to see how integrated systems come together in practice, or read more about why choose integrated lighting to understand the full scope of what a well-planned system can offer. To discuss your project, call us on [01793 315930](tel:01793 315930) or download our brochure to explore our work in more detail.
Frequently asked questions
Which smart lighting systems are most reliable for architect homes?
Hardwired systems such as Lutron, Control4, DALI-2, and Rako are considered the most reliable, particularly in new builds where circuits can be planned from the outset. They offer consistent performance and are not dependent on wireless connectivity.
How much should I budget for professional lighting integration?
A comprehensive system in a larger architect-designed home typically ranges from £15,000 to £35,000, covering controls, fittings, installation, and commissioning. The final figure depends on the scale of the property and the complexity of the control platform chosen.
Will integrated lighting actually save energy in my home?
Yes. Smart controls and sensors can reduce lighting energy use by up to 80 to 90 per cent in spaces where occupancy sensing and daylight harvesting are combined, with broader heating-related savings of 10 to 20 per cent through whole-home integration.
Do I need to plan lighting integration before my build or renovation?
Early planning is strongly advisable, as hardwired systems require cable routes to be established before walls are closed. Expert input at design stage also prevents over-bright or disjointed results that are costly to correct once a project is complete.